Integrating interactive elements into your Tkinter applications can significantly enhance user experience. One common scenario involves using a spinbox to allow users to select a value within a defined range. However, often you need to trigger actions based on the spinbox selection, such as displaying additional information or confirming a choice. This blog post will guide you through the process of effectively incorporating dialog boxes with Tkinter spinboxes, offering a more robust and user-friendly interface.
Displaying Dialogs Based on Spinbox Input in Tkinter
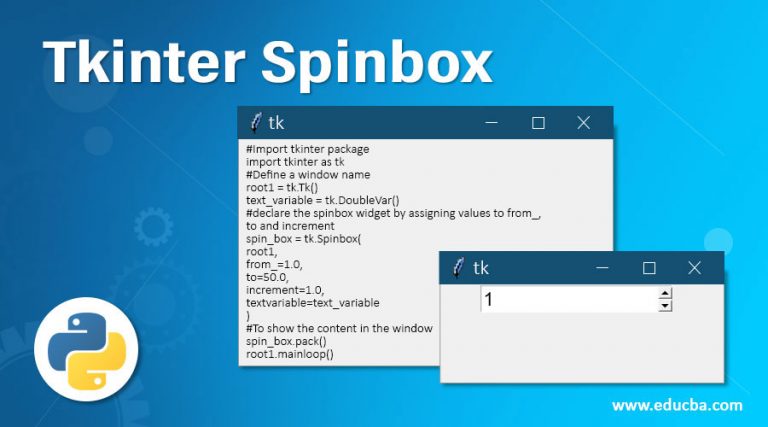
This section delves into the core mechanics of linking spinbox selections to dialog box displays in Tkinter. We’ll explore different approaches, focusing on simplicity and clarity. The fundamental approach involves utilizing the spinbox’s command option to trigger a function that creates and displays the dialog. This function will contain all the logic for creating and managing the dialog window. You can use different types of dialogs, from simple messagebox displays to more complex custom-designed windows, to meet your specific needs. This flexibility allows for customized user feedback and interactive control based on spinbox choices.
Using Tkinter’s messagebox for Simple Dialogs
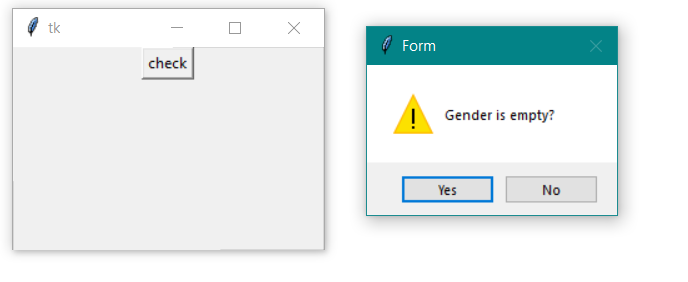
For straightforward confirmation or informational messages, Tkinter’s built-in messagebox is perfect. This is a simple way to provide feedback to the user after they have interacted with the spinbox. You can display messages like “Value selected: X” or “Please confirm your selection.” The simplicity of messagebox makes it ideal for quick notifications, but for more complex interactions, a custom dialog would be more suitable. The messagebox is easily integrated with a spinbox’s command function call, making it an efficient solution for basic dialog needs within your Tkinter application. Remember to import tkinter.messagebox to use this functionality.
Creating Custom Dialogs for Advanced Interactions
For more complex user interactions requiring more elaborate input or feedback, creating a custom dialog is necessary. This involves creating a new top-level window (Toplevel) and populating it with widgets appropriate for your needs, such as entry fields, labels, and buttons. This approach provides greater control over the dialog’s appearance and functionality. You’ll use functions to manage the dialog’s behavior, such as handling user input and updating the main application based on the dialog’s outcome. This strategy is more involved but allows for creating highly customized and user-friendly dialog experiences.
Example: Implementing a Confirmation Dialog
Let’s illustrate a practical application of showing a confirmation dialog after a spinbox value change. This example utilizes a messagebox for simplicity. The code below demonstrates how to trigger a confirmation dialog when the user changes the spinbox value. The dialog asks the user to confirm their choice. The user’s response (yes/no) then determines the next steps within the application. This is a basic example and can be expanded upon to include more complex logic and custom dialogs.
import tkinter as tk from tkinter import messagebox from tkinter import ttk def confirm_selection(): result = messagebox.askyesno("Confirmation", "Are you sure about this selection?") if result: print("User confirmed selection") else: print("User cancelled selection") root = tk.Tk() spinbox = ttk.Spinbox(root, from_=0, to=10, command=confirm_selection) spinbox.pack() root.mainloop()
Comparing messagebox and Custom Dialogs
| Feature | messagebox | Custom Dialog |
|---|---|---|
| Complexity | Simple, easy to implement | More complex, requires more code |
| Customization | Limited customization | Highly customizable |
| Use Cases | Simple confirmations, notifications | Complex interactions, detailed input |
Advanced Techniques and Considerations
While the basic examples provide a good starting point, several factors can influence the implementation. For instance, error handling ensures robustness. You should account for potential errors, such as invalid user input. Consider adding error checks and appropriate responses to make your application more reliable. Efficient resource management is crucial, especially for complex dialogs. Properly closing dialog windows and releasing resources prevents memory leaks and improves application performance. Learning about Tkinter’s event handling mechanisms will enable you to craft more responsive and interactive user experiences. Learn more about Tkinter.
Remember to always test your application thoroughly to ensure the dialog functionality works as expected under various conditions. Thorough testing helps identify and fix potential issues and ensures a positive user experience. This also includes edge cases, unusual inputs and scenarios that might not be immediately apparent.
Conclusion
Successfully integrating dialogs with Tkinter spinboxes significantly enhances user interaction and feedback. By leveraging the simple messagebox for quick confirmations or building custom dialogs for complex interactions, you can create more polished and user-friendly applications. Remember to consider error handling, resource management, and thorough testing for a robust and efficient solution. Now, go ahead and create those dynamic and interactive Tkinter applications! Learn more about building GUI applications and explore advanced features for an even more responsive experience. Consult this excellent Tkinter resource for deeper understanding and further exploration of Tkinter capabilities.
#1 Spinbox in tkinter | Python Tkinter GUI Tutorial part20 - YouTube

#2 Python - Tkinter askquestion Dialog - GeeksforGeeks

#3 simple dialog in tkinter // Taking input through dialog boxes - Dynamic

#4 Tkinter Spinbox | Useful Methods to Create Spinbox Widget using Tkinter

#5 Tkinter generating Spinboxes dynamically and reading the values and

#6 11. Dialogs in Tkinter | Tkinter | python-course.eu

#7 Giao din - Tkinter - Spinbox

#8 Spin Box in Tkinter (GUI Programming) Python Tkinter Tutorial
